
If you're planning to paint your home this year, the work you do before the first brush stroke matters more than most people realize. Good prep is what separates a paint job that looks sharp for a decade from one that starts peeling within a year or two. Rochester's weather puts homes through a lot, from humid summers to freezing winters, so cutting corners on preparation can come back to haunt you fast.
Whether you're tackling a DIY project or hiring a professional crew, understanding the prep process helps you make better decisions, avoid costly mistakes, and get results you'll actually be happy with. Let's walk through everything you need to know, starting with the inside of your home and then moving to the exterior.
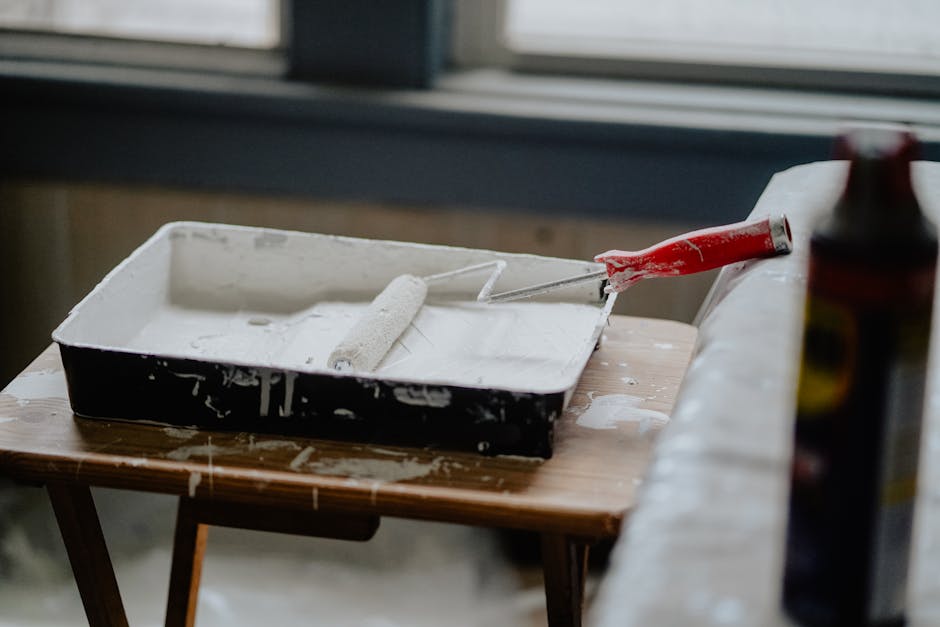
Interior Prep: Getting Your Rooms Ready
Interior painting prep is less about battling the elements and more about creating a clean, smooth canvas for the new paint to adhere to. Skip any of these steps and you'll see it in the finished product.
Clear the Room and Protect Your Belongings
Start by moving as much furniture out of the room as possible. For large pieces that can't be moved, pull them to the center of the room and cover them completely with drop cloths or plastic sheeting. Don't forget to remove curtains, blinds, light switch plates, outlet covers, and any wall-mounted fixtures or artwork.
Lay canvas drop cloths over the floor. Plastic sheeting is fine for covering furniture, but it's slippery underfoot and paint pools on it rather than absorbing. Canvas is safer and does a better job protecting your flooring.
Clean the Walls Thoroughly
Paint doesn't stick well to dirty surfaces. Even walls that look clean can have a thin film of dust, cooking grease, or nicotine residue that prevents proper adhesion. Here's what to do:
- Dust walls from top to bottom with a dry microfiber cloth or duster.
- Wash kitchen and bathroom walls with a solution of warm water and TSP (trisodium phosphate) or a TSP substitute. These areas collect the most grime.
- For other rooms, a damp cloth usually does the trick unless there are visible marks or stains.
- Let walls dry completely before moving on. Painting over damp drywall is a recipe for adhesion failure.
Repair Surface Damage
Walk around the room and look closely at every wall and ceiling surface. You're looking for nail holes, dents, hairline cracks, peeling paint, and any areas where the drywall tape has started to come loose. Rochester homes, especially older ones in neighborhoods like Brighton and Penfield, often have plaster walls with their own set of quirks, including larger cracks and areas of loose plaster.
- Fill small holes and dents with lightweight spackling compound. Apply it with a putty knife, let it dry, and sand it smooth.
- For larger cracks or damaged drywall seams, use mesh tape and joint compound, building up thin layers and sanding between each coat.
- Scrape off any peeling or flaking paint down to a solid edge, then feather the transition with sandpaper so it won't show through the new paint.
Sand and Prime
Lightly sanding your walls with 120- or 150-grit sandpaper creates a slightly roughened surface that helps new paint grip. This is especially important if the existing paint has a glossy or semi-gloss finish. After sanding, wipe the dust away with a tack cloth or damp rag.
Primer isn't always necessary, but you should use it in these situations:
- You're covering a dark color with a lighter one.
- You're painting over new drywall or fresh joint compound.
- There are stains from water damage, smoke, or markers (use a stain-blocking primer for these).
- You're switching between paint types, such as going from oil-based to latex.
A good primer coat saves you from having to apply extra topcoats, which saves both time and money. If you're working on an interior painting project in Brighton or anywhere else in the Rochester area, getting the primer right is one of the most important things you can do.
Tape and Mask Carefully
Use quality painter's tape (like FrogTape or 3M ScotchBlue) along trim, door frames, window casings, and ceiling lines. Press the tape down firmly with a putty knife or the edge of a credit card to prevent paint from bleeding underneath. Remove the tape while the final coat is still slightly tacky for the cleanest lines.
If you're painting ceilings, tape off the top edges of the walls. If you're only painting walls, tape the ceiling edge and all the trim.
Exterior Prep: Protecting Your Home from Rochester Weather
Exterior prep is a bigger undertaking, and it's arguably even more important than interior prep. The paint on your home's exterior is the first line of defense against rain, snow, ice, UV exposure, and the dramatic temperature swings we get here in Western New York. If the surface isn't properly prepared, moisture will find its way in, paint will peel, and wood will rot.
Inspect the Entire Exterior
Before you do anything else, walk around your house and take a close look at every surface. Bring a notepad and write down what you find. Pay attention to:
- Peeling, cracking, or bubbling paint
- Rotted wood on trim, fascia, soffits, or siding
- Gaps or missing caulk around windows, doors, and where different materials meet
- Mold, mildew, or algae growth, especially on north-facing walls
- Rusted nail heads or hardware stains
- Damaged or deteriorating mortar on brick or stone surfaces
Homeowners in Webster, Fairport, and other suburban communities often have homes with a mix of siding materials, including clapboard, vinyl, cedar shakes, and brick. Each material has its own prep requirements, so identify what you're working with before you start.
Power Wash (But Do It Right)
Power washing removes dirt, chalking paint residue, mold, and mildew that have built up over the years. It's one of the most effective prep steps for exterior painting. However, there are a few important guidelines:
- Use a pressure setting appropriate for your siding. Too much pressure can gouge wood, dent vinyl, or force water behind the siding.
- For most residential siding, 1,500 to 2,000 PSI is sufficient. Use a 25-degree or 40-degree nozzle tip.
- Add a mildewcide or bleach solution to the wash for any areas with visible mold or mildew growth.
- Always wash from the top down, and angle the spray so water runs off the siding rather than getting driven underneath it.
- Allow the house to dry thoroughly, typically 24 to 48 hours depending on conditions, before doing any additional prep or painting.
Scrape and Sand Loose Paint
Any paint that's peeling, flaking, or bubbling needs to come off. Use a paint scraper and work methodically, section by section. For larger areas, a heat gun can soften old paint and make scraping easier, but be cautious around older homes that may have lead-based paint. If your Rochester home was built before 1978, get a lead test kit from the hardware store or have a professional assess the situation before disturbing any paint.
After scraping, sand the edges where old paint meets bare wood to create a smooth, feathered transition. An orbital sander speeds up the process on flat siding, but you'll still need to hand-sand trim details and corners.
Make Repairs Before You Paint
This is the step a lot of people rush through, and it's usually the one they regret skipping. If you paint over rotted wood, the rot keeps spreading under the new paint. If you skip caulking, moisture gets in and the new paint peels within a season or two.
- Replace any rotted boards or trim pieces. Use primed lumber or composite materials that resist moisture.
- Fill smaller damaged areas with exterior wood filler or epoxy filler. Shape it to match the surrounding surface, let it cure fully, and sand smooth.
- Caulk all gaps around window and door frames, where trim meets siding, and around any penetrations like pipes, vents, or electrical boxes. Use a paintable exterior caulk rated for your climate.
- Set any popped nails, countersink them slightly, and fill the holes with exterior filler.
- Treat rusted nail heads or hardware stains with a rust-inhibiting primer before topcoating.
If you're getting ready for exterior painting in Penfield or a similar project anywhere in the Rochester metro, investing time in repairs now will extend the life of your paint job by years.
Prime Bare and Repaired Surfaces
Every area of bare wood, filler, or repaired surface needs a coat of primer before the topcoat goes on. For exterior work, use a high-quality exterior primer that's compatible with your chosen topcoat (latex primer for latex paint, or a bonding primer if you're switching from oil to latex).
Spot-priming is fine if only small areas were scraped or repaired. If you had to strip the entire surface, a full coat of primer is the way to go.
Timing Your Project for WNY Weather
Rochester's climate creates a relatively narrow window for exterior painting. Most exterior paints need temperatures above 50°F during application and for several hours afterward while the paint cures. Here's a practical seasonal breakdown:
- Late spring (mid-May through June): Great time to paint. Temperatures are moderate and humidity is manageable. Just watch for late-season rain.
- Summer (July and August): Generally good, but avoid painting in direct, intense sunlight or on days above 90°F. Paint can dry too fast in extreme heat, causing lap marks and poor adhesion.
- Early fall (September through mid-October): Another excellent window. Lower humidity and mild temps make for ideal conditions. Don't push it too late, though. Once overnight temps start dipping below 50°F regularly, exterior painting season is over.
- Winter and early spring: Focus on interior projects during these months. There's plenty of prep and painting you can get done inside while the snow flies.
If you're planning interior work in Pittsford or an interior refresh in Henrietta, winter is actually an ideal time to schedule since many painting contractors have more availability between November and March.
Common Prep Mistakes Rochester Homeowners Make
Over the years, we've seen plenty of paint jobs that failed prematurely because of prep shortcuts. Here are the most common mistakes and how to avoid them:
Painting Over Moisture Problems
If you have water stains on your ceilings or walls, painting over them without fixing the source is just cosmetic first aid. Find the leak, fix it, let everything dry out completely, then prime with a stain-blocking primer before painting. This applies to both interior and exterior surfaces.
Not Testing for Lead Paint
Many homes in Rochester, Buffalo, and the surrounding area were built well before 1978. If you scrape, sand, or disturb lead paint without proper precautions, you're creating a serious health hazard for your family. Test first. If lead is present, follow EPA guidelines or hire a contractor certified in lead-safe work practices.
Skipping the Primer
Modern paint-and-primer combos have their place, but they're not a substitute for a dedicated primer coat in every situation. If you're covering stains, painting bare wood, or making a dramatic color change, use a real primer. It's one extra step that makes a noticeable difference in the final result.
Painting in Poor Conditions
Painting when it's too cold, too hot, too humid, or right before rain is a common mistake on exterior jobs. Check the weather forecast for the next 48 hours before starting. On the interior side, make sure you have adequate ventilation, especially in bathrooms and kitchens where humidity can build up quickly.
When to DIY and When to Call a Pro
Some prep work is straightforward enough for a handy homeowner. Filling nail holes, cleaning walls, taping trim, and moving furniture are all manageable tasks. Exterior work like scraping a two-story home, making structural repairs, or dealing with lead paint is another story. Those situations call for experience, proper equipment, and safety training.
If you're comfortable on a ladder and have a free weekend, a single interior room is a reasonable DIY project. But if you're looking at multiple rooms, high ceilings, tricky surfaces, or a full exterior repaint, hiring a professional crew will save you time, produce better results, and let you skip the aches and frustrations that come with large-scale painting projects.
For homeowners across Western New York, whether you need interior painting help in Buffalo or residential painting services in Rochester, working with a knowledgeable local crew makes a real difference in how the job turns out and how long it lasts.
Ready to Get Started? MLZ Painting Can Help
If all this prep work sounds like more than you want to take on yourself, MLZ Painting handles it all. We prep thoroughly, make necessary repairs, and apply quality coatings that are built to handle Western New York's tough weather. We work with homeowners across Rochester, Buffalo, and the surrounding communities, and we're happy to walk you through exactly what your home needs.
Give us a call at (585) 362-2190 to schedule a free estimate. We'll come out, take a look at your home, and give you an honest assessment of the prep work involved and what the project will cost. No pressure, no surprises.
Whether you're freshening up a few rooms for the holidays or getting the exterior ready for summer, a little planning now goes a long way. And if you'd rather leave the ladders, scrapers, and sanders to someone else, that's exactly what we're here for.
No items found.
Contact Us
Ready to Transform Your Space? Get a Free Estimate Today
Thinking about a new color? Planning a full repaint? We'd love to discuss your project and provide a free, no-obligation estimate.