
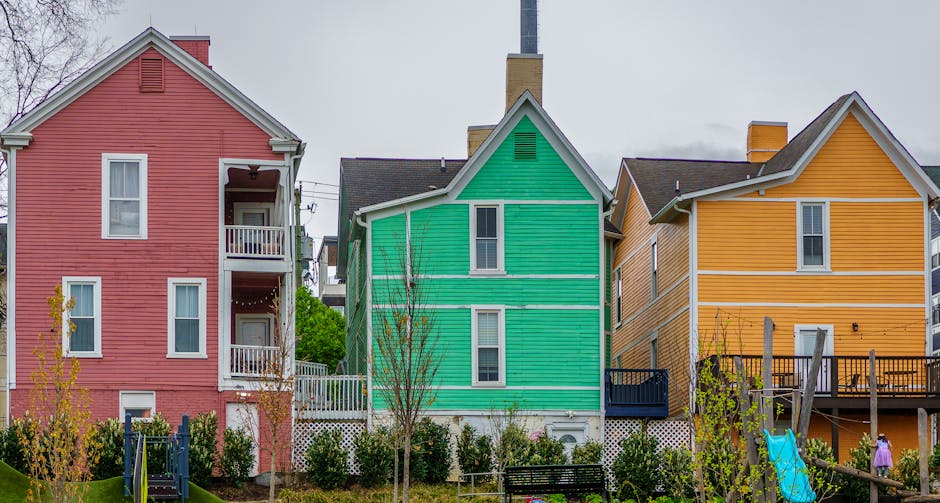
If you've lived in Western New York for even a single winter, you know what our weather does to the outside of a house. Months of freeze-thaw cycles, lake-effect snow, ice buildup, and bitter winds take a real toll on exterior paint. By the time April and May roll around, most homes in the Rochester and Buffalo area are showing some signs of wear, whether it's peeling paint on the south-facing side, cracked caulk around windows, or wood trim that looks a little worse for the last six months.
Spring is the ideal time to assess the damage and plan your next exterior paint job. But before you grab a brush or call a contractor, it helps to work through a thorough checklist. This guide walks you through everything you need to inspect, prep, and decide before painting season kicks into full gear.
Step 1: Walk the Perimeter and Inspect
The single most important thing you can do in early spring is a careful walk around your entire house. Grab a notepad or your phone and document what you see. You're looking for specific problems, not just a general sense of "it looks rough."
What to look for on siding
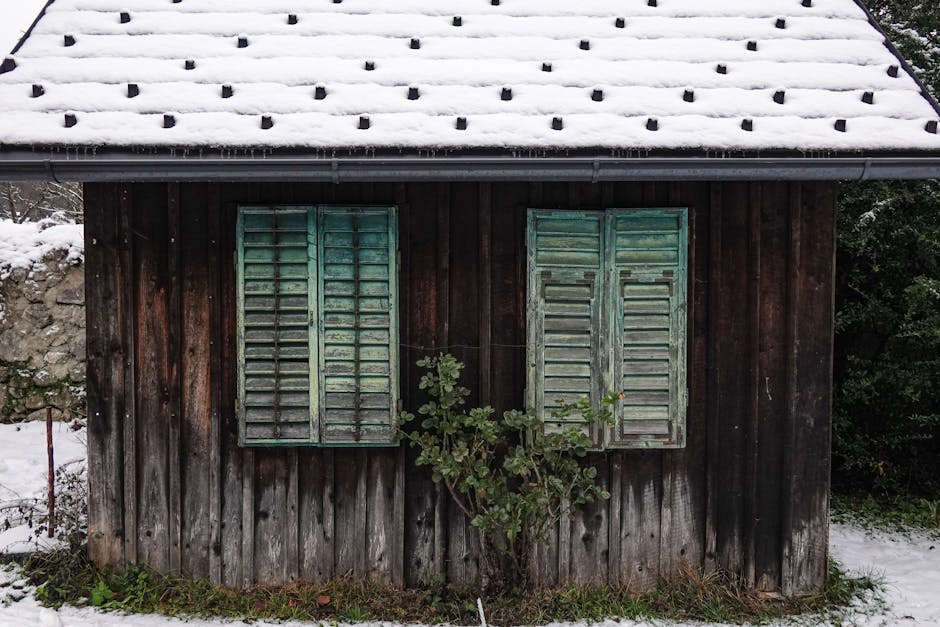
- Peeling or flaking paint: This usually means moisture got behind the paint film. It's common on north-facing walls and anywhere snow piled up against the house.
- Bubbling or blistering: Often caused by painting over damp wood or by moisture pushing outward from inside the wall. This needs to be addressed at the root cause, not just painted over.
- Chalking: Run your hand along the siding. If you get a powdery residue on your fingers, the paint is breaking down. A light chalking is normal for older paint, but heavy chalking means it's time to repaint.
- Cracking or alligatoring: When paint develops a pattern of deep cracks that looks like reptile skin, the coating has lost its flexibility. This is past the point of spot repair and usually means a full repaint is needed.
- Fading: WNY gets more sun than people think during summer. South and west-facing walls fade faster, especially with darker colors.
- Mold or mildew: Look for dark spots or green/black streaks, particularly on shaded walls or near landscaping. This has to be cleaned and treated before any paint goes on.
What to look for on trim, windows, and doors
- Rotted wood: Press a screwdriver into suspect areas. If it sinks in easily, the wood is rotted and needs to be replaced before painting.
- Cracked or missing caulk: Check every seam where trim meets siding, around window and door frames, and where different materials meet. Failed caulk is one of the biggest sources of moisture problems.
- Rusted nail heads: These bleed through paint and will keep showing up unless they're sanded, primed with a stain-blocking primer, and re-coated.
This inspection step is something homeowners across the region deal with every year. Whether you're in Brighton, Irondequoit, or out in Buffalo and the surrounding suburbs, the winter damage patterns are remarkably similar. The key is catching problems early before they get expensive.
Step 2: Evaluate Whether You Need a Full Repaint or Spot Repairs
Not every house needs a complete exterior repaint every spring. Sometimes targeted repairs and touch-ups are enough to buy you another year or two. Here's a rough guide to help you decide:
Spot repair might be enough if:
- Paint failure is limited to a few small areas (usually less than 10% of the total surface).
- The overall color still looks good and consistent.
- Caulk and wood are in decent shape with only minor fixes needed.
- The last full paint job was done within the past 5 to 7 years with quality products.
A full repaint is probably needed if:
- Peeling, cracking, or chalking is widespread across multiple walls.
- You're seeing bare wood or primer exposed in several spots.
- The color has faded significantly or you want to change colors.
- The last paint job was more than 8 to 10 years ago.
- Previous painters cut corners with prep or used low-quality paint, and it's showing.
If you're on the fence, it's worth having a professional take a look. A good painter can tell you honestly whether spot work will hold up or whether you're better off doing the whole house now and doing it right.
Step 3: Address Repairs Before Any Paint Goes On
This is where a lot of DIY paint jobs and cheap contractor jobs go wrong. Painting over damaged surfaces is a waste of time and money. The new paint will fail in the same spots, often within a single season.
Common repairs to handle first
- Wood replacement: Rotted boards, trim, fascia, and window sills need to be replaced with new wood or a composite material. In WNY, we see a lot of fascia damage from ice dams, so check those areas carefully.
- Caulking: Remove all cracked, peeling, or separated caulk and replace it with a high-quality, paintable exterior caulk. Pay special attention to window and door frames.
- Nail pops and loose siding: Re-secure any loose clapboards or siding panels. Set nail heads below the surface and fill with exterior wood filler.
- Gutter and downspout issues: If gutters are overflowing or leaking behind the fascia, that moisture will destroy any new paint. Fix drainage problems before you paint.
For homeowners in areas like Penfield and Pittsford where many homes have older wood siding and detailed trim work, this repair step is especially important. Skipping it leads to callbacks, frustration, and wasted money.
Step 4: Clean Everything Thoroughly
Paint doesn't stick to dirty surfaces. Period. Before any primer or paint goes on, the exterior needs to be properly cleaned.
- Power washing: A thorough power wash removes dirt, mildew, loose paint, and chalky residue. The key is using the right pressure. Too much pressure damages wood siding and can force water behind your siding. A professional knows how to dial in the right PSI for each material.
- Mildew treatment: If you found mold or mildew during your inspection, treat those areas with a bleach solution or a dedicated mildew cleaner before power washing. If you just blast it off, the spores remain and regrow under the new paint.
- Drying time: After washing, the house needs to dry completely. In WNY's spring weather, this can take 2 to 4 days depending on humidity and temperature. Don't rush this step.
Step 5: Scrape, Sand, and Prime
Proper surface preparation is the difference between a paint job that lasts 3 years and one that lasts 10. Here in Western New York, where our exteriors endure such extreme temperature swings, prep work matters even more than it does in milder climates.
Scraping
All loose, peeling, and flaking paint needs to be scraped back to a sound edge. On older homes, this can be a significant amount of work. If your home was built before 1978, be aware that lead paint may be present. Lead-safe work practices aren't optional; they're required by EPA regulations, and a professional contractor will follow them.
Sanding
After scraping, sand the edges where old paint meets bare wood to create a smooth transition. This prevents the "picture frame" look where you can see the outline of every scraped area through the new paint. A final light sanding of all surfaces gives the new paint something to grip.
Priming
Bare wood, wood filler, and stain-prone areas (like knots and rust bleed) all need primer. Use a high-quality exterior primer appropriate for the surface. On bare wood, an oil-based primer still gives the best adhesion and moisture protection, even though the topcoat will likely be a water-based acrylic.
Step 6: Choose the Right Paint for WNY Conditions
Not all exterior paints are created equal, and product choice matters more in our climate than in many parts of the country. Here's what to consider:
- 100% acrylic latex: This is the standard for exterior topcoats now. It stays flexible through temperature swings, resists cracking, and handles moisture better than older oil-based topcoats.
- Quality tier: This is not the place to save money. Premium paints from Benjamin Moore, Sherwin-Williams, or similar manufacturers contain more resin and pigment, which means better coverage, better color retention, and a longer lifespan. The difference in cost between a budget paint and a premium one is a few hundred dollars for a whole house. The difference in longevity can be 5+ years.
- Sheen: Flat and matte finishes hide imperfections on siding but are harder to clean. Satin is a popular middle ground for siding, offering some sheen and easier cleaning. Semi-gloss is standard for trim, doors, and shutters because it's durable and easy to wipe down.
- Color considerations: Darker colors absorb more heat and tend to fade faster, especially on sun-exposed walls. If you love a deep color, consider using it as an accent on doors or shutters and choosing a lighter shade for the main body.
Step 7: Timing Your Paint Job Right
In Western New York, the exterior painting window is roughly late April through October, depending on the year. But not all months within that window are equal.
Ideal conditions for exterior painting
- Air temperature between 50°F and 85°F (check the paint can for specific recommendations).
- Surface temperature in a similar range. A wall in direct afternoon sun can be much hotter than the air temperature.
- Low humidity, ideally below 70%.
- No rain in the forecast for at least 24 to 48 hours after application.
- No heavy dew expected overnight if painting late in the day.
Spring-specific concerns in WNY
April and early May can be tricky. Daytime temperatures might be perfect, but overnight lows can still dip into the 30s. Paint that hasn't fully cured before a cold night can develop adhesion problems. Most professional painters in the Rochester area wait until nighttime lows are consistently above 45°F before starting exterior work. Late May and June are typically the sweet spot for scheduling.
This is one reason it's smart to start planning now. If you wait until June to call a painter, you might not get on the schedule until July or August. The best contractors in places like Victor, Fairport, and Williamsville book up fast once painting season starts.
Step 8: Protect Landscaping and Surrounding Areas
Before painting begins, take some time to protect the things around your house:
- Trim bushes and shrubs back at least 18 inches from the house. This gives the painter access, improves air circulation for drying, and protects your plants from paint drips and overspray.
- Cover flower beds, walkways, and decks with drop cloths.
- Remove or cover light fixtures, house numbers, and anything mounted to the exterior walls.
- Move patio furniture, grills, and anything else within the work zone well away from the house.
A professional crew will handle most of this, but trimming back your landscaping ahead of time is a big help and can actually save you money on labor.
Step 9: Know When to DIY and When to Hire a Pro
There's no shame in painting your own house, and there's no shame in hiring someone either. Here's a realistic breakdown:
DIY might make sense if:
- Your home is single-story with easy access on all sides.
- The prep work is minimal (light sanding, spot priming).
- You have the right equipment, including a quality sprayer or at least good brushes and rollers, plus proper ladders.
- You have the time. A full exterior on even a modest house takes most homeowners 3 to 5 weekends.
- You're comfortable working on ladders safely.
Hiring a professional makes sense if:
- Your home is two stories or has areas that require tall ladders or scaffolding.
- There's significant prep work: lots of scraping, wood repair, or lead paint concerns.
- You want it done quickly and correctly in a defined timeframe.
- You value a warranty on the work.
- Your home has architectural details, multiple colors, or challenging angles.
Many of the homes in Henrietta and across the greater Rochester area have two-story sections, attached garages, and detailed trim that make professional painting the safer and more practical choice.
A Quick Note on Interior Projects While You're At It
Spring is also a natural time to tackle interior painting projects. If you're already planning exterior work, it's worth thinking about whether any rooms inside need attention too. Many homeowners bundle interior and exterior projects together to save on mobilization costs and get everything done in one stretch. If that sounds appealing, take a look at our residential painting services for a better sense of what we offer inside and out.
Ready to Get Started? Let MLZ Painting Help
If this checklist has you thinking it's time for a fresh coat on your home's exterior, MLZ Painting would be happy to help. We work with homeowners throughout Western New York, from Rochester's east-side suburbs to Buffalo and everywhere in between. We'll give you an honest assessment of what your house actually needs, whether that's a full repaint, targeted repairs, or just some advice on timing.
Give us a call at (585) 362-2190 to schedule a free estimate. We'll come out, walk the house with you, and put together a clear scope of work and price so you know exactly what you're getting. Spring is the time to plan, and the sooner you reach out, the easier it is to get on the schedule before the busy season hits.
Whether you're in Webster, Clarence, or anywhere else in WNY, we'd love to hear from you.

Contact Us
Ready to Transform Your Space? Get a Free Estimate Today
Thinking about a new color? Planning a full repaint? We'd love to discuss your project and provide a free, no-obligation estimate.